
1. Start Here: What Matters Most
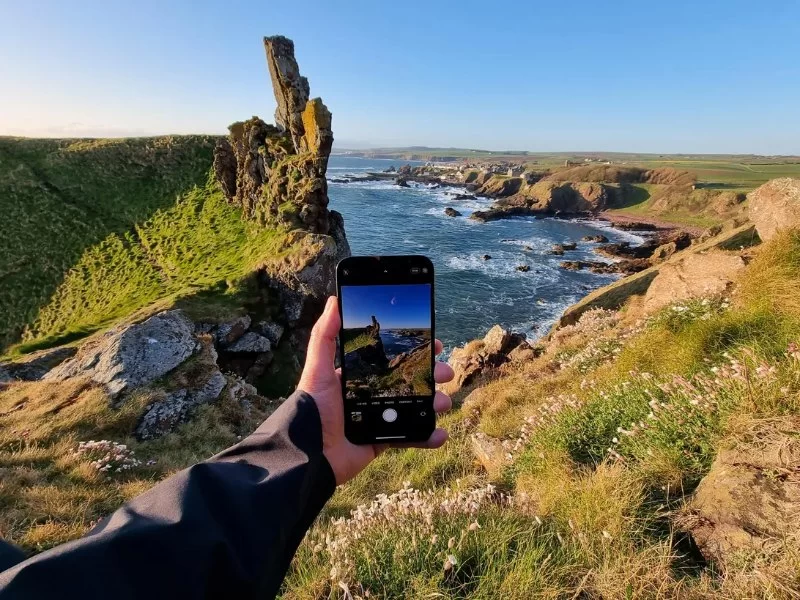
Your phone is already a capable landscape camera. The fastest way to take amazing photos of American landscapes with your phone is to master three pillars: light, composition, and stability. Sensors are small and honest—give them good light, clear structure, and a steady hold, and they’ll reward you with sharp, vivid frames that travel well from screen to print.
1.1 The “30-Second Rule”
Before every shot, spend 30 seconds scanning the frame for distractions, moving your feet to simplify lines, and locking exposure on the brightest area. This tiny ritual elevates casual snaps into intentional photographs.
1.2 The “Two Frames” Habit
For every scene, make two versions: one wide for grandeur, one tight for texture. The Grand Canyon needs the sweeping rim, but also the sunlit striations on a single rock face.
2. Light and Timing in Iconic U.S. Spaces
American landscapes are diverse: red rock deserts, alpine lakes, coastal fog, prairie skies. Each responds differently to light. To take amazing photos of American landscapes with your phone, plan your day around the sky.
2.1 Golden Hour Plays
At sunrise in Utah’s canyon country, side-light carves depth into formations; at sunset in California’s Big Sur, the Pacific turns into liquid metal. Use your phone’s exposure slider to slightly underexpose—preserving color in the sky and avoiding flat highlights.
2.2 Midday Strategies
Harsh noon sun? Seek backlight. Silhouettes at Monument Valley or tree canopies in Acadia become graphic when the sun is behind your subject. Turn on HDR to retain detail in both shadows and highlights.
2.3 Weather as a Creative Tool
Fog in the Smokies, storms rolling across the Dakotas, fresh snow in the Rockies—these conditions soften contrast and add drama. Keep a microfiber cloth handy; a clean lens is your best “upgrade.”
3. Composition That Works from Coast to Canyon
Composition is portable—what works at Oregon’s coast also works in Arizona’s slot canyons. The following structures are reliable and teach your eye what to chase.
3.1 Foreground–Midground–Background
Anchor the frame with a foreground: driftwood on Cannon Beach, a cactus pad near Sedona, river stones in Yosemite Valley. This layering pulls the viewer into the scene and counteracts the phone’s naturally wide perspective.
3.2 Leading Lines and Natural Frames
Use boardwalks in Everglades, trail switchbacks in Zion, or a pier on Lake Michigan to lead the eye. Frame with overhanging branches or archways (Delicate Arch at a respectful distance) for context and scale.
3.3 Rule of Thirds—and When to Break It
Turn on grid lines. Place horizons on a third—low to emphasize sky in the Great Plains, high to focus on reflections in Glacier’s lakes. Break the rule for symmetry: the Tetons mirrored on still water beg for a perfect center split.
4. Pro Phone Settings for Travelers
To truly take amazing photos of American landscapes with your phone, spend a few minutes in the camera settings before you fly.
4.1 RAW + HEIC/JPEG
If your phone supports RAW, enable it. RAW files hold more detail for editing, especially in sunrise/sunset gradients. Keep a standard format for quick shares.
4.2 Focus and Exposure Lock
Tap-and-hold to lock focus and exposure on a mid-tone (a gray rock, not the blinding sky). Slide exposure down slightly to protect highlights; you can lift shadows later.
4.3 Ultra-Wide, Main, and Telephoto
Use the main lens for best quality. The ultra-wide is great for tight overlooks (Horseshoe Bend’s rim), while telephoto compresses distant ranges in Colorado. Avoid digital zoom; step closer or crop after.
4.4 Panorama and Long Exposure Modes
Panorama stitches are ideal at Bryce Canyon amphitheater or the Badlands. For waterfalls in the Adirondacks, try long-exposure mode; brace the phone to avoid micro-shake that can blur foliage.
5. Live Field Stories from the Road
5.1 Sunrise at Acadia’s Cadillac Mountain
We arrived 45 minutes before dawn, parked below the summit, and hiked the final stretch. With gloves on, I preset my phone to RAW and exposure-locked on the pre-dawn band of orange. When the first light hit the islands, I crouched low, pulling blueberry shrubs into the foreground. Two frames later, I had depth, color, and scale—shot entirely on a phone.
5.2 Fog Break on the Pacific Coast Highway
Midday fog rolled back like a curtain. I placed the horizon high to feature the satin ocean. Switching to the ultra-wide, I used a cliff-edge fence as a leading line. A quick -0.3 exposure tweak and the image held highlight detail without losing mood.
5.3 Moab After Rain
Storm cells left mirror-puddles on slickrock. I shot low and parallel to the surface, turning small puddles into sky fragments. A telephoto shot compressed distant mesas against the storm’s last light: dramatic, handheld, and phone-simple.
6. Editing on the Go: A Clean Workflow
Editing should polish, not disguise. Aim for natural color that resembles what you felt in the moment.
6.1 A Three-Step Pass
First, straighten and crop. Second, adjust exposure: raise shadows modestly, protect whites, add a touch of contrast or clarity for rock texture. Third, color: warm sunrise scenes slightly; cool alpine lakes to keep water true.
6.2 Presets with Restraint
Build two or three custom looks: “Desert Warm,” “Coastal Cool,” “Alpine Neutral.” Consistency matters more than trends—your trip will read like a story, not a filter roulette.
6.3 Export for Print and Share
Export a full-resolution file for prints and a web-size copy for messaging. Keep a small watermark off to the edge if you plan to post widely.
7. Micro-Itineraries Built for Photos
Short windows? Try photo-first planning. These 24–48 hour outlines maximize the chance to take amazing photos of American landscapes with your phone.
7.1 Desert Spectacle: Zion + Bryce (2 Days)
Day 1: Riverside Walk late afternoon for reflected canyon light; Watchman sunset from the bridge. Day 2: Bryce at sunrise (amphitheater pano), then Fairyland Loop for hoodoo close-ups with foreground deadwood.
7.2 Coast + Redwoods (2 Days)
Day 1: Prairie Creek elk at golden hour; Fern Canyon long exposure in shade. Day 2: Trinidad Head sunrise, then foggy forest paths with backlighting for ethereal beams.
7.3 Mountain Classic: Grand Teton (1–2 Days)
Sunrise at Schwabacher Landing for mirror reflections; midday telephoto layers from Signal Mountain; sunset alpenglow from Mormon Row with barns as scale anchors.
8. Gear That Earns Its Weight
Travel light, choose pieces that multiply your shots.
8.1 Stability
A compact tripod or clamp mount for fences; at minimum, brace on a rock and use the 3-second timer to dodge shake.
8.2 Lenses and Filters
Clip-on lenses vary; keep expectations realistic and prioritize the phone’s native lenses. A magnetic variable ND helps with long exposures of waterfalls or cloud streaks.
8.3 Power and Protection
Carry a slim power bank, a weather sleeve, and a lens cloth. A clean, dry lens beats any software fix.
9. Ethics, Safety, and Stewardship
Stay on marked trails, respect closures, and practice Leave No Trace. Never step backward near cliffs while watching your screen. If wildlife appears, switch to telephoto and keep distance—no shot is worth stress on an animal or risk to you.
10. Plan Like a Pro with Refined Travel
If you want customized photo-friendly routes, sunrise/sunset timing, and lodging positioned for quick access to viewpoints, Refined Travel can curate itineraries, local guides, and time-saving logistics. Turn your phone into a landscape storyteller—and turn a weekend into a gallery of images you’ll be proud to print.

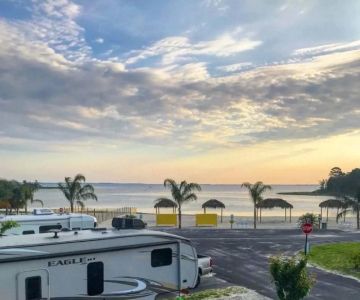

 Salt Springs Resort4.0 (133 reviews)
 Big Spring Campground4.0 (11 reviews)
 Magnolia Mobile Home Park4.0 (6 reviews)
 Monett Village Mobile Home & RV Park4.0 (16 reviews)
 Whites Point R475.0 (1 reviews)
 Jefferson4.0 (18 reviews)
 Exclusive Travel Packages for First-Class Travelers: A Guide to Luxury Vacations
 Refined Travel Experiences in Southeast Asia: Explore Luxury & Unique Destinations
 How to Make the Most of Luxury Vacation Deals: Expert Tips for Savvy Travelers
 Refined Travel Itineraries for Art and Culture Lovers: Explore the World of Art and History
 How to Enjoy a Refined Travel Experience in the Mountains
 Most Luxurious Destinations for Honeymooners: Top Spots for Romance and Luxury